Too many options can be confusing, and it isn’t always clear what the advantages are of one type of nail extension or nail polish over the other. Read on for the answers to some of the most common questions we receive about nail gels, extensions, and nail polishes.
Contents
- Gel Nail Extensions
- Acrylic Nails
- The difference between gel and acrylic nails
- The difference between gel polish and regular nail polish
- Other types of nail extensions
Gel Nail Extensions
The most common questions are: “What are gel nails?” and “How do gel nails work?” To put it simply, gel nail extensions are a type of false nail that can be extended and sculpted. The gel extension bonds to a real nail semi-permanently, but fits on like a press-on nail. This gel extension then requires a gel base coat, colour, and top coat. Gel extensions are then shaped, preserved and hardened with an LED or ultraviolet light.
The Benefits of gel nail extensions
Gel nail extensions vs acrylic look more natural than other types of nail extensions. Gel nail extensions also look glossier, and the curing time (the time it takes for the gel to harden) is faster than with acrylics.
Gel nail extensions also have mixtures that lack the fumes and the chemicals associated with acrylic nails. For these reasons, many beauty technicians offer gel nail extensions as a safer, more environmentally friendly alternative to acrylic nails.
Arianna Grandé often wears gel nail extensions.
Are gel nails safe?
We are sometimes asked, “do gel nails ruin your nails?” Improper removal can damage the nail bed, especially if this happens a lot. Moderation is key. Give your nails gel breaks from time to time, and let your nails rest and grow. If you have any further questions, consult your nail technician.

How to do gel nails step-by-step


For best results, we would always recommend visiting a qualified nail technician to apply gel nail extensions. But if you fancy a DIY gel nail manicure and learn how to do gel nail extensions, try following these steps:
- Start with the ultimate ‘blank nail’ when planning sculpted gel nails. File and shape your nails before cutting them. Then think of a shape. Popular gel nail shapes include round, square, almond, oval, and pointed shapes. With shapes like these, you can make nails such as coffin gel nails and french manicure gel nails. Then cut the shape you want, using a nail buffer to finalise sculpting gel nails in the shape exactly as you want it.
HINT: It is important to choose the right shape because your gel nail extensions will be based on the shape. Gel nails are not like acrylic nails, which can be shaped during and after applying. - Use a cuticle remover. Cuticle is a fancy word for ‘dead skin at the base of a fingernail’. Make sure to clear it up before applying gel polish.
- Apply a base layer of gel polish. There only needs to be a very thin base coat layer with gel polish; much thinner than regular nail polish.
HINT: If you are looking to touch-up your gel nails, then this is the perfect time to apply gel nail infills. After about three weeks of nail growth, there is usually an uncoated bit of the nail at the base where it has grown. A gel nail infill refers to the process of touching up the gel polish on a growing nail. - Apply the colour and cure. Once the base layer has dried, it’s time to apply another thin layer — but this time of colour gel. Make sure to paint over the tips of the nails to prevent the gel from curling back on itself. Cure this layer under a UV lamp for about three minutes. Then add another colour, rinse and repeat.
HINT: Don’t worry if the first layer appears streaky, that’s what the second layer is for. - Apply your top gel. Apply generously over the gel nail tips, painting right over the top. Like with the previous layers, you will need to cure the gel polish under a UV light for about three minutes.
And that’s it! How to do UV gel nails, on a simple step-by-step basis. After the top gel is applied, in some instances there is what’s known as “tacky” left behind on the gel nail overlay. Tacky refers to a sticky later left after some gel application methods. To get rid of it, take a cotton ball dipped in isopropyl alcohol and remove it that way.
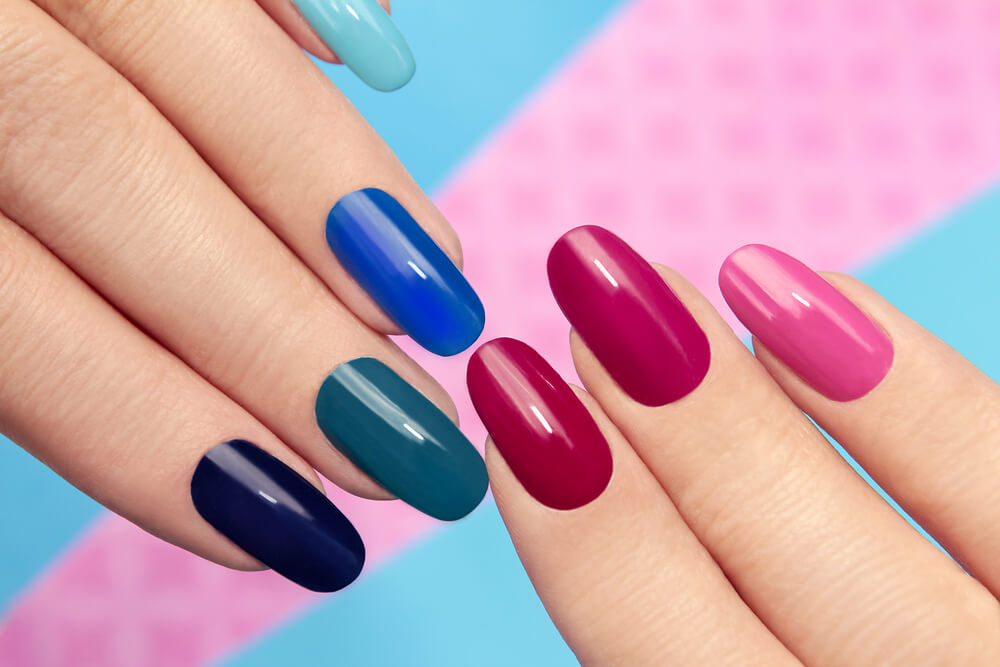
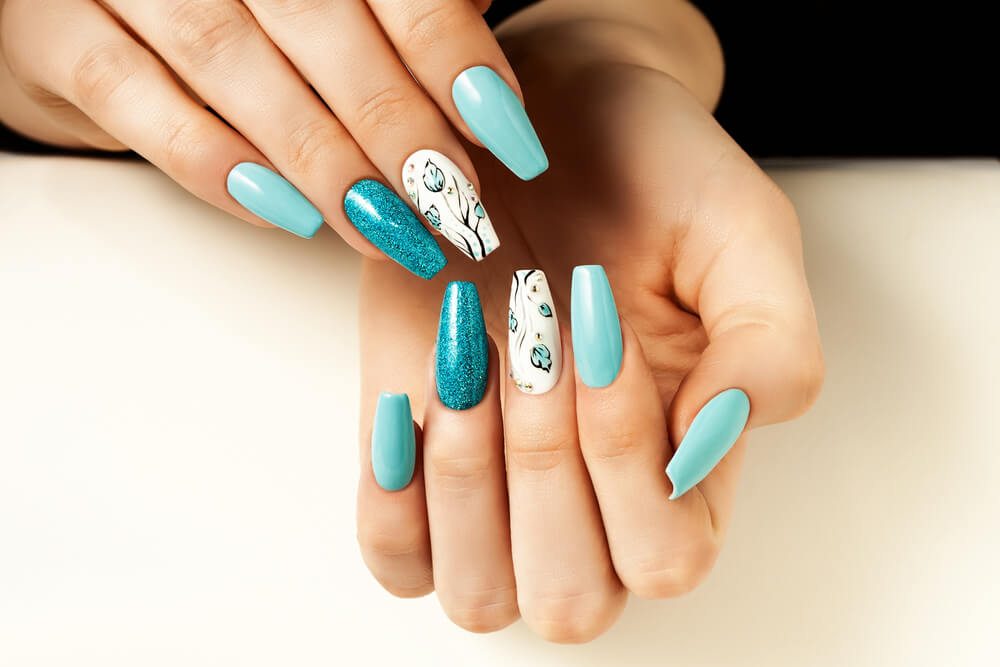
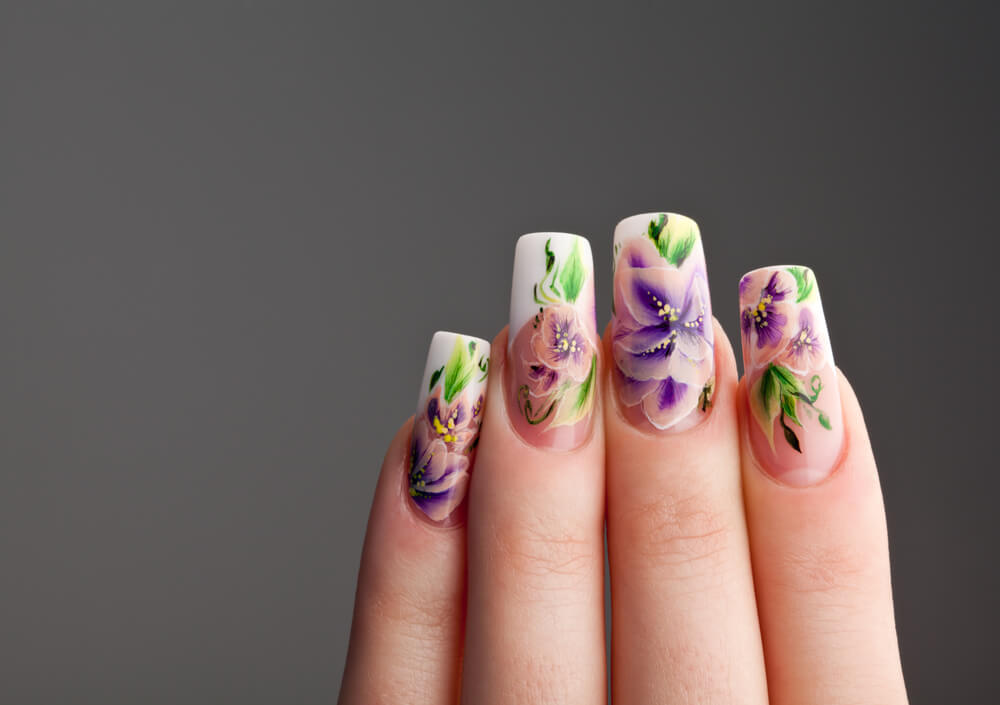
Here are some images of gel nails, of the different types:


How to remove gel nail extensions
We would always recommend visiting a professional nail technician to remove gel nail extensions, as improper removal can damage the nail bed. That being said, if you are still looking to remove gel nail extensions yourself, here’s what you can do:
- Buff the surface of your gels with a nail file. Some gel nails will need to be filed off if they want removing. This will break through the top gel and allow your nail polish remover to sink in properly.
- Soak a cotton ball with a 100% pure acetone or dedicated gel remover. Then place it on top of your nail. The gel nails should crumble off quite easily. Gel remover is expensive and hard to find, but it is gentler on the nail bed.
HINT: It is important to use pure acetone. Typical nail polish removers don’t have as much acetone, meaning it can take a long time to remove the gel nails. - Wrap foil around your nail and the cotton ball. And then repeat this process for the other nails. Allow 15 minutes for the gel to start crumbling. If the gel is not crumbling, you may need to soak your nails for a bit longer. Gel polish removal follows a similar process.
- Gently get rid of the remaining glue and residue. You can do this by using a cuticle pusher. There may also be some clear residue left behind from the process, so give your hands a good wash and buff afterwards.
- Hydrate your nails. This is best done using a cuticle oil and moisturiser on the nail bed.
For this reason, gel nails are sometimes referred to as soak off gel nails, as all you have to do is use foil and acetone to soak them off until they’re ready to peel.
Hard gel nails
Hard gel nail extensions are, despite the name, closer to acrylic nails in almost every way — from sculpting to shaping — except they are cured through UV light. Acetone cannot break down these long gel nails. The only way to remove them is to file them off completely.
How much are gel nails?
The average gel nails price can be anywhere between £25 – 35 in the UK. Circumstances dependent on the nail technician, the salon, and even the location of the salon can all affect the pricing.
Can you paint over gel nails?
Painting over gel nails is no problem at all. You can use regular nail polish over gel nails as much as you desire. It is also easy to remove regular nail polish without damaging the gel nail, but you must use a non-acetone remover to leave the gel intact.
How long should gel nails last?
How long do gel nail extensions last? In most cases, gel nail extensions last at least two full weeks. And in a lot of cases, they can last three weeks, depending on your natural rate of nail growth.
If you are using a regular nail polish, and not gel nail polish to paint your gel nail extensions, then you can repaint your gel nails as often as you like without needing gel nail infills — like with acrylics. You can extend the life of your gel nail extensions with good maintenance: by cutting and shaping them as they grow.
Another question we often hear is: “How long do gel nails take?” The answer is, it depends on the gel and the gel methods used. We would say at the longest it may take up to a bit over an hour, but some nail technicians can apply gel nail extensions within 15 minutes.
Things to remember if you have gel nail extensions
Gel nails tend to need regular maintenance. So if you want to keep them in good condition, you will need a number of filler appointments with your nail and beauty technician.
Another downside is that gel nail extensions don’t last as long and are less durable than acrylic nails. Gel nail damage tends to make the gel nail shatter. If this happens a nail technician will have to reapply a new gel nail.
Gel nails on short nails can be difficult to apply — especially if the nail beds are both short and wide. Gel nails on bitten nails can also be difficult to apply. Remember to consult your nail technician, who can give you reasonable expectations.
Gel nail extensions also tend to cost more money than other types of nail extensions.
Acrylic Nails
Acrylic nails are one of the oldest forms of artificial nail. We are often asked: “What does acrylic mean?” The acrylic meaning comes from the recipe that makes the acrylic nail extensions possible. The word “acrylic” itself is a describing word, referring to certain materials that are made artificially in order to imitate a natural substance.
An “acrylic” is essentially a type of plastic. (In the language of chemistry: acrylic nails are a mixture of polymethyl methacrylate and ethyl methacrylate. The former is a polymer powder; the latter is a liquid monomer.)
Unlike gel nail extensions, which require UV light to harden and set, the chemical formula of acrylic nails hardens after around 20-30 seconds of exposure to the air. The curing process for acrylic extensions can then take up to a further 15 minutes to complete.
The benefits of acrylic nail extensions
Acrylic nails are strong and durable and are known for their longevity. Acrylic nails can last well up to a month, or four weeks, after having them put on; the removal process is very simple and straightforward (see below). Acrylic nail extensions are also a cheaper alternative to gel nail extensions.
Kylie Jenner and Gigi Hadid often wear acrylic nail extensions.
How to apply acrylic nails step-by-step
It might look easy to apply acrylic nails, especially after watching a skilled nail technician. But it can be very difficult to do on your own. It will take a lot of time and patience to learn how to apply acrylics to oneself in the correct and proper way. You will need a DIY acrylic nails at home kit, too. Here’s how to do acrylic nails:
- Apply a cuticle remover and cuticle pusher to the nail area. Make sure there’s no debris or dead skin on the nail bed, as the acrylic will not stick to it, and give the nail a good clean. A nail buffer will remove excess shine, and a manicure brush will sweep away excess dust.
- (If applicable) Apply your acrylic nail tip. Make sure the nail tip fits your nail from side-to-side, and apply a small amount of nail glue to the nail tip where it connects with the nail bed. Then cut the nail tip to the length you want. This step is only needed if you are applying acrylic nail tips and not an acrylic overlay. (An acrylic overlay covers the entire nail bed and not just the tip.)
- Dehydrate the natural nail with a nail dehydrator. Nails are naturally alkaline, and acrylic is naturally acidic, so it is important to change the base of the nail bed before adding the acrylic to the nail. If the nail dehydrator does not have an acid free nail primer included within it, make sure you add an acid free nail primer to the nail bed.
- Pour your acrylic liquid into a Dappen dish, then dip the acrylic brush into the dish. This is where it starts to get difficult. Push the brush tip right to the bottom of the Dappen dish to remove any unwanted air bubbles. Then gently remove the brush from the dish and give it a swipe on the edge to remove excess liquid.
- Create a ‘ball’ of acrylic. To do this, dip the brush tip into acrylic powder, and stroke the brush through the powder. This motion should create a little ball. Then press the brush (with the ‘ball’ attached) into a lint-free pad to drain away any excess liquid.
HINT: The ‘ball’ should resemble a tiny little golf ball. If the ball is too wet, or too dry, abandon it and start all over. - Apply the acrylic to your nail. Start at the top of the nail, near the cuticle, and brush down to the very tip. Press the brush flat to the nail and move gently to smooth out any bumps. If you need more acrylic, repeat steps four and five until you are happy with the result.
- (If applicable) Use a pinching tool to make the nail longer, stronger, and slender. If you’re feeling confident, place the pinching tool on the nail like a clamp, while the acrylic is drying. Leave the tool in a clamp-like fashion for about three minutes. After three minutes, tap the nail. If it ‘tings’ leave the pinching tool on a bit longer. Once you’re confident the tool has done the job, unclip it to remove.
- Dry and file. Let the acrylic dry. This should take about two minutes. Then file the nail to smooth it out and refine the shape that you want.
- Finish your acrylic nails off with a top coat and a stroke of cuticle oil. A top coat will seal in the acrylic. Depending on whether you have a UV light at home, different coats will be needed. Apply a mega gloss or matt top coat if you DO have a lamp. Otherwise, use an air dry top coat. Finally, rub the cuticle oil into the area to finish off the process.
With these acrylic nail tips, you should be able to experiment at your leisure. If you enjoy DIY acrylic nails, you might be interested in acrylic infills.
How long do acrylic nails take?
The application of a plane acrylic nail overlay can take 30 – 45 minutes, not including time for nail design. For acrylic nail extensions, it can take anywhere between 1 and 2 hours. Acrylic tips take less time to apply than extensions, as glueing acrylic tips is a quicker process than forming, building, and sculpting full-on acrylic nails.
How long does it take to get acrylic nails? It all depends on the acrylic manicure you want; the method of extensions/what enhancement you want, and the skill of the nail technician. French manicure acrylics, for example, can take a particularly long time to apply. But it’s not really an application that takes a long time, it’s the adding of acrylic nail paint, polish, and design afterwards.
Can you paint over acrylic nails?
There wouldn’t be much fun in acrylic nails is you couldn’t decorate them with beautiful paint, art, and unique designs.
It is perfectly alright to paint over acrylic nails. Just make sure you follow these simple steps:
- Remove the old nail paint. To start over fresh, remove any traces of the old nail polish on your acrylic nails. One thing is very important to remember though: make sure your nail polish remover is WITHOUT acetone. Acetone will destroy the acrylic, so avoid it.
- Wash your nails. Wash them with ordinary water, and dry them with a soft cotton pad. It is important to wash your nails to prevent bacteria and fungi from settling there.
- Apply a base coat. This will help to protect your acrylic nails.
- Apply two to three coats of nail polish. There’s no specific rule here, feel free to experiment with acrylic paint and colours and get your nails looking the way you want them.
- (Optional) Apply a top coat to finish it off.

How to take off acrylic gel nails
We would always recommend visiting a qualified nail technician when taking off acrylic nails. However, we are often asked about how to take acrylics off at home. If you really want to do it; perhaps you put the acrylics on yourself (see our DIY section above), then here is a little step-by-step guide. How to get acrylics off at home:
- Clip your nails down and then file them. The shorter you go, the easier it will be to remove your acrylic nails. Then gently file away at the acrylic covering the whole of the nail.
- Protect your skin before applying acetone. A nice petroleum jelly will keep the skin and your nail beds nice and hydrated, protecting them from the harsh effects of acetone.
- Soak the nails in acetone for about 30 – 40 minutes. People often ask about how to soak off acrylic nails. The best way to do it is to soak a cotton wool pad in acetone, place it over your nails, and then wrap each nail in foil to secure the wool pad in place.
Buff and nourish your hands. After half an hour, the acetone should have crumbled away most of your acrylic nails. Buff to get rid of any leftover bits, and reward your hands with a heavy lather of hand cream to get over the trauma.
How long do acrylic nails last?
Acrylic nails can last up to 3 – 4 weeks. After that, it’s likely your nail growth will start to cause ‘gaps’ where the new nail bed has grown up under the acrylic. That’s when most people opt for acrylic infills. Acrylic infills are a sort of ‘top-up’ acrylics manicure session. Rinse and repeat.
How much are acrylic nails?
Another common question is: “How much do acrylic nails cost?” The answer is: at least £25. Anything below that should set alarm bells ringing. If you find a cheaper price of acrylic nails at a salon, you might wonder if they are cutting corners. The average price is £25 – 30 but in some areas, the price could be as high as £40.
Pictures of acrylic nails
There are many different types of acrylic nails. Some of the most popular types include: short coffin acrylic nails, long coffin acrylic nails (pictured below, left), almond acrylic nails, short square acrylic nails, and long square acrylic nails (pictured below, right).


Things to remember if you go for acrylic nails
There are some disadvantages of acrylic nails you should be aware of. If they aren’t applied by qualified a nail technician, acrylic nails can look “fake” or less natural than gel nails, especially if they are applied unevenly or incorrectly. The application process also involves strong-smelling chemicals and fumes which can be nauseous.
The process of application and removal can be annoying and take a lot of time. Also, if the acrylic nails are improperly applied and removed this can cause acrylic nail damage. Nails after acrylics, improperly cleaned, can turn into a breeding ground for bacteria and fungi.
Gel nails vs. Acrylic nails: The difference between gel and acrylic nails
If you’ve read this guide all the way through you should have an idea by now about the differences between gel and acrylic nails. But if you’re skimming through, here are the fundamental differences:
- Gel nails are considered a healthier alternative to acrylic nails because acrylics often require the mixing of strong and potent chemicals.
- Acrylic nails are stronger, cheaper, and last longer than gel nails.
- Gel nails look are said to look more authentic.
- The main difference between acrylic and gel nails is how they are cured. Gel nails harden when exposed to UV light. Acrylics harden naturally as soon as the acrylic mixture is created.
Gel Polish: The difference between gel polish and regular Nail Polish
Gel polishes look great on all types of nails: acrylic nails with gel polish will look great, as will your natural nails and gel nail extensions. Gel polish has a mirror-like shine to it that is chip and crack resistant. On the other hand, it is common for regular nail polish to chip within a week.

What is gel polish?
Gel polish is a type of nail polish that will only dry under a direct UV or LED light. Regular nail polish will dry out if exposed to the air. The gel turns hard as it cures under UV light, but in a way that encourages bonding with additional coats afterwards.
Is gel polish the same as gel nails?
Gel polish is not the same as gel nails. From our understanding, when people say “gel nails” what they are actually referring to is gel nail extensions. Gel nail extensions are artificial nails made of gel that are sculpted and cured with UV light. Similarly, gel polish is cured with UV light, but gel nails can take about 10 minutes to cure, whereas gel polish dries pretty much instantly.
In short: gel polish is just a nail polish. Gel extensions are a nail enhancement and will need a polish on top.
Applying gel polish
Gel polishes are painted on to the nail in the same way that regular nail polish is. To gel polish nails is thought to be easier than polishing them with regular nail polish because gel polish is self-levelling and won’t leave brush strokes.
How to remove gel polish from acrylic nails
Gel polish looks great on any nail type, but removing gel polish can be a little tricky with acrylic nails. Here’s how to remove gel polish from acrylic nails in a few steps:
- Apply a non-acetone nail polish remover to a cotton wool ball. If you’ve read the whole guide by now, you will know that acetone destroys acrylic nails. A non-acetone nail polish remover, however, will simply wipe away a gel-based polish.
- Hold the cotton ball over the nail. Press it down for about five seconds and wipe up the nail. Keep doing this until the gel polish is gone. Depending on the strength of the gel polish and the polish remover, you may need to use at least three cotton balls to get the job done.
- Buff and file away any lingering gel polish. A 150-180 grit nail file should be more than enough to wipe away any lingering gel polish. This last step could take a while, however, so make sure you’ve got something to do.

How to do nail art with gel polish
Nail art is thought to be easier with gel polish because it dries quickly with a UV lamp. So you can create successive overlays quickly with different patterns on and dry them just as easily.
Just apply the gel nail polish like normal, cure it under a UV light, and then add successive layers for decoration. Glitter gel is popular and can be firmly embedded into the coat with an orange stick. Or you can paint a pattern as your heart desires. Then finish with a brilliant glossy top coat.
Things to remember if you use gel polish
Gel polish is extremely durable and can last for weeks. Although it can be tempting to keep gel polish on for a long time, the reality is this can be suffocating for the nail bed. Remove your gel manicure after two to three weeks and allow your nails to breathe.
Gel polish can only cure under a UV light. Although the risk is very low, regular exposure to high-intensity UV lights (like the one in your nail lamp) can damage the body’s DNA. Be sensible and only use in moderation.
Other types of nail extensions
Acrylics and gel nail extensions are not the only two types of options out there if you are thinking of getting nail extensions. There are two other popular alternatives: fiberglass nails and silk wrap nails. However, both fiberglass nails and silk wrap nails are applied using the same techniques. The only real difference is not the method, but the fabric that is used.
Silk wrap nails
Silk wrap nails, or silk nail extensions, are — as the name suggests — made from silk. Silk is a very thin material, and so can result in great natural looking nails. The disadvantages of silk nail wraps is that the silk nails can break from just washing your hands.
Silk wraps can be used on their own as a natural nail coating, or alongside acrylic nails to make them stronger.
Fiberglass nails
Fiberglass nails are nails made out of — as the name suggests — fibreglass. (Note: In the UK, we usually spell the word ‘fibreglass’. As in ‘fibreglass nails’. ‘Fiberglass’ is the American way of spelling it. But it seems the US spelling is used more than the standard British spelling, even in the UK.)
Fibreglass is a material composed of tiny, stuck-together glass fibres. Like with silk wraps, they can make great natural looking nails. But they can break quite easily. Like their silk counterparts, they should be touched up on every two or three weeks. Removing fiberglass wrap nails requires the same process as removing acrylic nails (see above).
We hope you have found this guide helpful.
If you would like to learn more about nails and beauty, perhaps you want to become a qualified nail technician or beautician yourself, why not check out one of our nail and beauty courses? We host accredited courses all over the UK, with practical lessons taught by great teachers.
Click here to visit our home page and learn a little more about us.